Sam: (267) 962-4555
If you don’t have a website link to send your students to, text Sam to have one created for you. Click below to see two examples:
(At the bottom of this page you can see an example of the paragraph we copy and paste into the notes sections on our ads.)
Scroll Down to see Step-by-Step Instructions⤵️

Step 1
After you log in, there is a black menu bar on the left of your screen. There are 2 calendar icons. The top one has a +. Click “Training Entry”.

Step 2
In the top, right corner there is a blue button. Click “New Event”.

Step 3
Scroll down until you see #144404 as shown in the picture above. “Health & Safety Institute: Pediatric First Aid/Child and Infant CPR and AED”
Click the button in the top right corner of THAT class that says, “Select”.

Step 4
Do nothing on the next page except Click “Continue”.

Step 5
On this page, Select the language you will teach the class in. Then Click “Continue”. (Leave Event Founder Blank).

Step 6
Click the boxes that pertain to your class. The ones in the picture are the ones we recommend. See the next step for second set of boxes.

Step 7
Make sure you at least click ‘Hybrid’. Then Click “Continue”.

Step 8
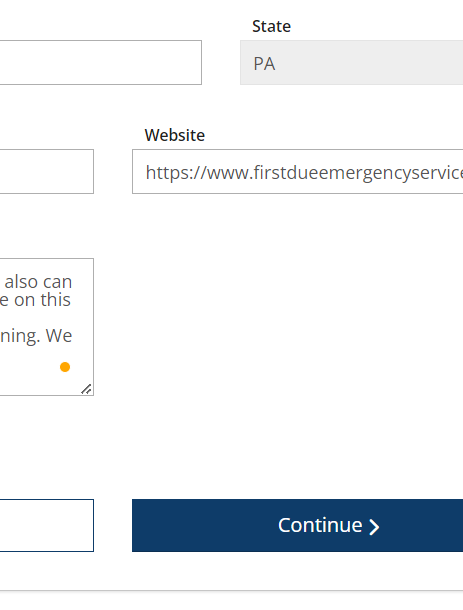
ALWAYS make sure ‘Public Search Results’ is set it “Yes”. Select ‘Blended’. Then paste the link you want the CPR students to use to contact and/or register for the class. (If you do not have a website, Text Sam.)

Step 9
Enter the class address. If you have saved this address before, just start typing the name of the location and it will pop up. (Read Step 10 before moving on.)

Step 10
In the notes section, you can copy and paste your own paragraph letting students know you teach multiple times a month at times not listed in this single ad. (We have an example at the bottom of this webpage).
Make sure you check the box to save the location.

Step 11
Mark “No” for both “Self-Paced” and “Multiple Sessions”. Enter the date and time of your class. CLASS MUST BE AT LEAST 2 HOURS LONG.
In the “Addl. Date/Time Info” box you can paste the paragraph from Step 10.
(You can NOT do multiple classes on the same ad. You MUST do all 18 steps per class you want to advertise.)
Step 12
Paste your link from Step 8 in the “Website” box. Paste your paragraph from Step 10 in the “Additional Contact Info” box. Then Click “Continue”.

Step 13
Select “Yes” for “Registration Required”. The recommended last date for CPR Students to register pops up. You can change it if you want. (We leave ours as is to get the maximum registration amount.) Set “Registration Fee” to “Yes” and type how much you charge per CPR Student.

Step 14
Click “Save & Review” in the botom right corner.

Step 15
Click “OK” on the pop-up.

Step 16
VERY IMPORTANT: You MUST Click the blue “Submit Event” button in the top right corner or the ad will not post.

Step 17
Click “OK” on the pop-up.

Step 18
VERY IMPORTANT: To make sure Step 16 was completed, look for the words “Status Approved” in the top left of the page. All Done. (To see a list of your ads, scroll down Before you press the blue button on Step 2.)
You can NOT do multiple classes on the same ad. You MUST do all 18 steps per class you want to advertise.